Monday, 14 July 2014

Knitted Baby Hat - Unisex Gnomey Baby Hat

Knitted Baby Hat - Unisex Gnomey Baby Hat

When knitting baby clothes, sometimes it's hard to find good unisex designs that will fit either a boy or a girl. I chose this Ravelry pattern for a Gnomey Baby Hat.

Knitted Baby Hat - Unisex Gnomey Baby Hat

I CO 60st using Chunky yarn as I was planning to use it when the baby is a few months old, which would have been winter time.

I did 1 inch garter border, then knit in round till 4 inch.

I decreased as per instructions except accidentally only did one knit row between decrease rows instead of the ones recommended, so the hat is less “gnomey”.

I ended decreasing with 6 st, which I knitted for a few rounds and then ended with Just a Leaf pattern, also from Ravelry.

Then I added ear flaps as per instructions, decreased to 3 st and finished with 12 inch icords, as from experience I prefer to tie baby hats on, so that stay in place on a wriggly baby.

Hat diameter ended up about 16 inch which was perfect for a bigger baby.

Knitted Baby Hat - Unisex Gnomey Baby Hat

Knitted Baby Hat - Unisex Gnomey Baby Hat


Knitted Baby Hat - Unisex Gnomey Baby Hat

Knitted Baby Hat - Unisex Gnomey Baby Hat

(Update: be sure to check out my free knitting patterns for a new baby)

Friday, 11 July 2014

"Handsome Cables" Knitted Baby Boy Cardigan Free Knitting Pattern

"Handsome Cables" Knitted Baby Boy Cardigan Free Knitting Pattern

When expecting my fifth baby, I decided to knit a "going home" outfit in blue, in case the baby was boy, and in pink, if it was a girl (I did not know what I was having). The idea was that once the baby is born, it will be dressed in the appropriate outfit, and the unused set  would end up being a doll's outfit for other kids to play with.

I love cables and I love lace, so the idea for "Handsome Cables" Baby Boy cardigan pattern was born.

Knitted Baby Boy Cardigan Free Pattern

"Handsome Cables" Top Down Raglan Style
Baby Boy Cardigan Free Knitting Pattern
Following the seamless top-down raglan style cardigan rules (as I did not fancy sewing any seams - for a beginner it seems daunting), I knitted up this cute baby boy cardigan. I am happy to share my pattern notes for this baby boy cardigan for free, providing that you follow this copyright notice:

Copyright Notice
Feel free to share a link to this pattern by linking to my blog and giving copyright credit to © CraftsAdore, but do not copy the pattern and claim as your own. The pattern is as-is, and I cannot provide any individual support on it. This pattern may not be used to produce items for commercial purposes - you may knit from this pattern for own personal use only or for charity. Please feel free to share your finished project by adding your comment to this post. ❤ Happy Knitting! 

"Handsome Cables" Top Down Raglan Style
Baby Boy Cardigan Free Knitting Pattern

Key:
K - Knit Stitch
P - Purl Stitch
C4F - Cable 4 Front
C4B - Cable 4 Back
K2tog – knit two together
YO – yarn over
PSSO – pass the slipped stitch over
Sl 1 – slip one st knitwise unless otherwise stated
SSK – slip slip (knitwise) knit through the back loop
K2Tog tbl – knit two together through back loop
x - e.g. x2 or x3 - repeat that many times the pattern in the preceding round () brackets

Level : Advanced Beginner
Tags : Newborn, Newborn-size, Baby, Top-Down, Raglan, Cardigan, Sweater, Buttoned, Seamless, Hospital, Home Coming, Layette
Yarn: DK or Worsed Yarn,
Gauge: 5st per 1inch, (20st per 4 inch), 7 rows per 1 inch (28 rows per 4 inch)
Chest: 18” (0-6 months)  - CO 56st
Length from back of neck: 10” (make it 12” if want longer)
Sleeve length from under arm: 5-6”
across shoulders: 7.25”

Equipment: 4 markers in one color (marker PM), and 4 markers in another color (marker IM)
4mm UK / 6 US long circular needles for main body & sleeves on magic loop
3.25mm UK / 3 US long circular needles for cast on of neck & bottom rim and sleeve rims
Cable needle

Cast On:
Using 3.25mm circular needles (knitting back and forth, not in the round),
CO 54 st , using long tail method (it is then increased to 68 st in row 6)


Collar: (in seed rib stitch aka hurdle stitch)
Row 1 WS:           Sl1 purlwise, Knit (this will be the wrong side of your work)
Row 2 RS:            Sl1 purlwise, *K1, P1; repeat from * to last st, K1.
Row 3 WS:           Sl1 purlwise, Knit to end
Row 4 RS:            Sl1 purlwise, *K1, P1; repeat from * to last st, K1.
Row 5 WS:           Sl1 purlwise, Knit to end
Row 6 RS:            Sl1 purlwise, *K1, P1; repeat from * to last st, K1.
Row 7 WS:           Sl1 purlwise, Knit  to end
Row 8 RS:            Sl1 purlwise, *K1, P1; repeat from * to last st, K1,
Row 9 WS:           CO 7st, Sl1 purlwise, Knit to end, turn work & CO 7st  (68st)

Set up “increment” stitch markers (IM) and “pattern markers” (PM) as follows:
(IM markers are shown in Red on my picture below, and PM markers Blue and Black)

7st (rim PM) - 10st (front 1 IM) – 7st (sleeve IM) – 20 st (back IM) – 7st (sleeve IM) – 10st (front 2 PM) – 7st (rim PM),
(you will only use 2 PM to start, the others will be used after row 22 - see special notes below)


Knitted Baby Boy Cardigan Free Pattern

Yoke (with increments done on RS rows only):
Switch to 4mm circular needles (knitting back and forth, not in the round)

Row 1 (RS):
Rim 1:                 Sl1 purlwise, (P1, K1) x3
Front 1:               [P2, K1, YO, SSK], [P2, (C4B) x2, P2], [K1, YO, SSK, P2]
Sleeve:                K all st to 1 st before next IM, KFB, slip IM, KFB
Back:                  K all st to 1 st before next IM, KFB, slip IM, KFB
Sleeve:                K all st to 1 st before next IM, KFB, slip IM, KFB, K any stitches to PM
Front 2:               [P2, K1, YO, SSK], [P2, (C4F) x2, P2], [K1, YO, SSK, P2]
Rim 2:                 (K1, P1) x3, K1

Row 2 (WS):
Rim 1:                  Sl1 purlwise, K6
Front 1:                [K2, P3], [K2, P8, K2], [P3, K2]
Sleeve:                 P all st, slip IM
Back:                   P all st, slip IM
Sleeve:                 P all st, slip IM, P any stitches to PM
Front 2:                [K2, P3], [K2, P8, K2], [P3, K2]
Rim 2:                  K7

Row 3 (RS):
Rim 1:                  Sl1 purlwise, (P1, K1) x3
Front 1:               [P2, K2tog, YO, K1], [P2, K2, C4F, K2, P2], [K2tog, YO, K1, P2]
Sleeve:                 K all st to 1 st before next IM, KFB, slip IM, KFB
Back:                   K all st to 1 st before next IM, KFB, slip IM, KFB
Sleeve:                 K all st to 1 st before next IM, KFB, slip IM, KFB, K any stitches to PM
Front 2:               [P2, K2tog, YO, K1], [P2, K2, C4B, K2, P2], [K2tog, YO, K1, P2]
Rim 2:                 (K1, P1) x3, K1

Row 4 (WS):
Rim 1:                  Sl1 purlwise, K6
Front 1:                [K2, P3], [K2, P8, K2], [P3, K2]
Sleeve:                 P all st, slip IM
Back:                   P all st, slip IM
Sleeve:                 P all st, slip IM, P any stitches to PM
Front 2:                [K2, P3], [K2, P8, K2], [P3, K2]
Rim 2:                  K7

SPECIAL NOTES FOR FRONT1/FRONT2 Cable Pattern & increases:
First few row repeats will not have enough stitches yet to complete full "Front 1"/"Front 2" patterns, so until the increments are added, you can only fit as much as you can of the cable repeats (i.e. first several stitches of pattern st for "Front 1", and last several stitches of pattern st for "Front 2" – if there is not enough stitches to do a full cable pattern, just K those stitches). This way you will have at least partial cable pattern  "squeezed" to fit into this space and it will look nicer than just knitting those stitches. For example:

Row 1 - Front 1 Do the first and Third brackets, end with a kfb. 
Row 3 - Front 1 do first bracket, {Knit all stitches for First cable bracket bit} Purl 2, knit 3, End with a Kfb. Front 2 KFB, Knit 3, purl 2 and do last bracket. 
Row 4 - Front 1 knit 2 purl to marker. Front 2 purl to last two and knit those. 
Row 5 - Front 1 do first bracket, Purl 2, Knit 4, Kfb. Front 2 kfb, Knit 4, Purl 2, Do last bracket. 
Row 7 - Front 1 Do first bracket, purl 2, knit to last stitch, kfb. Front 2 work front 1 backwards.
Row 9 - Front 1 Do first bracket, do up two second cable and kfb in last stitch of cable. Now have enough stitches to work the cables and the increases will be easy to add in the pattern now. Front 2 slip 2 st on cable needle, KFB then work stitches on cable needle, continue in pattern.

SPECIAL NOTES FOR MARKERS SET UP:
On first 22 rows, PM and IM will actually be in the same position (so you can use just IM) - KFB 1 st before and after marker.
Once you reach 22st on Front 1 & 2, you can place a PM and you’d be K those extra st between PM and IM on RS, and P on WS, remembering to increase 1 st before and after IM by KFB on RS only till row 32.

Knitted Baby Boy Cardigan Free Pattern


Continue in pattern - i.e. repeat 1-4 pattern till 32 rows as follows (rows in bracket - don't forget to add button holes):

RS  Row 1 pattern:   1, 5, (9), 13, 17, (21), 25, 29
WS Row 2 pattern:   2, 6, 10, 18, 22, 26, 30
RS  Row 3 pattern:   3, 7, 11, 19, 23, 27, 31           Boys Button Rows: (9), (21), (33) i.e. every 12 rows                                                                               (see “Single Button Row” instructions) on Rim 1
WS Row 4 pattern:  4, 8, 12, 20, 24, 28, 32
Knitted Baby Boy Cardigan Free Pattern

Main Body:
Divide work for fronts & back and sleeves:

Row 1 : Continue as per pattern to sleeve marker (DON’T forget the button hole), K2, CO 5st using cable cast on, slip Sleeve rest of stitches on spare yarn, continue pattern to next Sleeve marker, K2, CO 5st, slip Sleeve stitches on spare yarn, continue in pattern till end. Remove all IMs, Continue with Row 2-4 pattern.

Repeat row 1-4   till back from collar measures 8’’ (about 8 repeats), or continue for longer if prefer longer style e.g. 10’’, but without any more IM, (keep PM and follow Rims & Front1/2 patterns).
Row 1 & 3, knit between “pattern” markers
Row 2 & 4, purl between “pattern” markers
Knitted Baby Boy Cardigan Free Pattern

Bottom Rim:
Switch to 3.25mm needles
Repeat seed rib stitch for 9 rows as per collar pattern, starting on RS pattern:
RS : Slip first stitch purlwise, *K1, P1* repeat till end
WS: K all stitches

BO on WS: K1, *K1, Slip second st over first st * repeat to end

Single Row Button:
If you need visual help on single row button technique, there are some great youtube videos, e.g.
https://www.youtube.com/watch?v=EY4vBzLo-Xs 

Step 1: Once you have reached to row in your knitting where you want to place the button (i.e .row 9 in this pattern, and then (21), (33) i.e. every 12 rows - depending how many buttons you want, I did 3), first do (Sl1 purlwise, K1, P1), then bring the working yarn forward and continue as follows:
Step 2: Slip the next stitch from your main needle purl wise.
Step 3: Bring the working yarn back.
Step 4: Slip the next stitch from your main needle purl wise again.
Step 5: Pass the second stitch on your working needle over the first stitch.
Repeat steps 4 and 5 for as many stitches as is needed to fit your button (x2). Slip last st back on main needle
Step 6: Turn your work over.
Note: You may want to pull very tight on your working yarn before the next step and continue pulling tight for the first stitch. This will prevent or limit holes next to the buttonhole.
Step 7: Using the cable cast on, add the same number of stitches as was bound off to your main needle + 1. (3st)
Step 8: Turn your work over again.
Step 9: Slip the next stitch from you main needle purl wise.
Step 10: Pass the additional stitch from you cast on over the first stitch on your working needle.
Step 11: Pass the first stitch on your working needle back to the main needle.
Step 12: Work the next stitch in pattern and continue knitting as normal.
Note: You may need to k2tog/ p2tog or through the back loop to tighten up any loose stitches.


Knitted Baby Boy Cardigan Free Pattern

Sleeves:
Transfer stitches from spare yarn, join in round, picking up & knitting into extra 10 st from under arm. Continue to knit in round till under arm measures 4”.
Switch to 3.25mm and repeat seed rib pattern for 10 rows:
Round 1 : *K1, P1*, repeat to end.
Round 2 : P all st
BO in purl pattern.

Note: sleeves knitted in the round will not match exactly the gauge of main body, so either knit more loosely, switch to larger needles or knit flat and then sew the edges under arm.
Knitted Baby Boy Cardigan Free Pattern


Update: my baby ended up being a boy, and this blue cardigan, together with a Gnome hat and some knitted converse booties, was my favourite outfit for him for the first 6 months. And the beauty of this design is that if the cardigan is a bit too big, you just roll up the sleeves, and once it gets too small, the sleeves become 3/4 style, so I actually managed to get a year's worth wear out of it, which made all this knitting worth it!.
My Baby Boy @ 2 weeks old in his handsome cables baby cardigan

Happy in his baby cardigan @ 10 weeks
And still loving it @ 6 months
Why not try some matching baby boy booties to go with this baby cardigan ? My cute stay on baby boy booties free knitting pattern is available here.

Please feel free to share your finished project by adding your comment to this post. ❤ Happy Knitting! 

Thursday, 10 July 2014

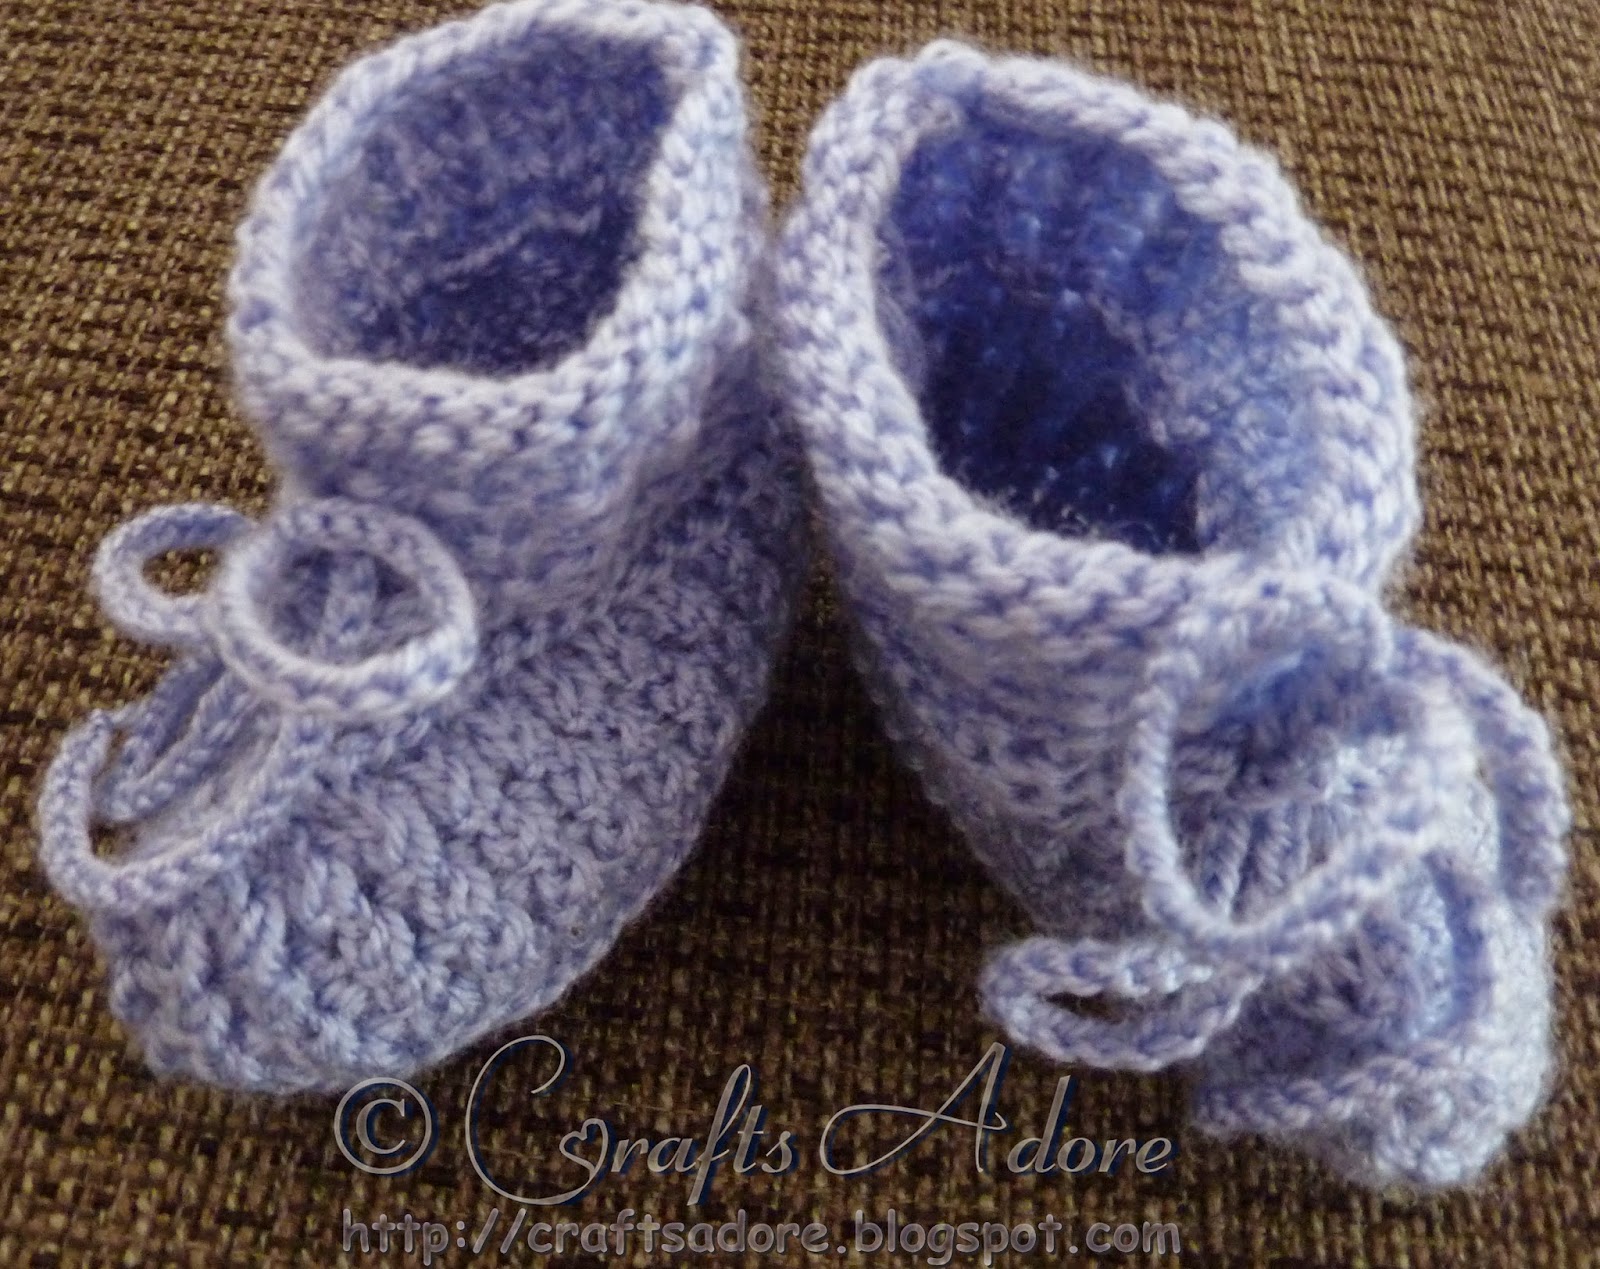
Cute Stay On Baby Booties Free Knitting Pattern

Cute Stay On Baby Booties Free Knitting Pattern

These booties were knitted once my baby was born, so I chose to do it in blue, but the pattern is unisex and can be adapted to be knitted in white, pink or whatever colour you chose. They are very practical, because the I-cord laces can be used to tie the booties so they stay on a wriggly baby without falling off.


I am happy to share my pattern notes for this cute stay on baby booties knitting pattern for free providing that you follow this copyright notice:

Copyright Notice
Feel free to share a link to this pattern by linking to my blog and giving copyright credit to © CraftsAdore, but do not copy the pattern and claim as your own. The pattern is as-is, and I cannot provide any individual support on it. This pattern may not be used to produce items for commercial purposes - you may knit from this pattern for own personal use only or for charity. Please feel free to share your finished project by adding your comment to this post. ❤ Happy Knitting! 

Tags

Booties Baby Bottom-up In-the-round Seamless One-piece Unisex Newborn-Size Hospital Boy Girl Written-Pattern


Needles
3.25mm long circular needles for magic loop
DK yarn in chosen colour

These cute stay on booties are knitted in the round from bottom sole up and have absolutely no seams to sew other than a couple of tails to weave in.

Terms:
K knit
P Purl
M1:  Make 1 (a method of increasing which is almost invisible, done by inserting tip of left needle underneath the little "bar" of yarn which runs between the needles, from front to back, forming a new stitch on the left needle, and then knitting into the *back* of that new stitch)
K2tog:  Knit two stitches together
P2tog:  Purl two stitches together
YO:  Yarn over (bring yarn from back of work to front of work -- makes a hole if "knitting" all stitches)
KFB: Knit into the front and back of each stitch

Sole:
CO 18 sts, using Judy’s Magic Cast-on on each needle (you want first purl bump row to be on outside/bottom when you begin round 1), the tail will be on the right hand side for the beginning of each round.

Round 1 Purl
Round 2 Knit
Rounds 3, 5, 7, 9, and 11: purl
Round 4: *K 1, M 1, K 16, M 1, K 1;* repeat on other needle
Round 6: *K 2, M 1, K 16, M 1, K 2; * repeat
Round 8: *K 3, M 1, K 16, M 1, K 3; * repeat
Round 10: *K 4, M 1, K 16, M 1, K 4; * repeat
Round 12: * K 5, M 1, K 16, M  1, K 5; * repeat

Now each needle has 28 sts for a total of 56 sts.

Sides:
Blanket Rib Stitch:

Repeat 2 rounds 4 times:
Round 1:       Knit into the front and back (KFB) of each stitch
Round 2:       * (K2tog, P2tog) rep from * till end of round

Instep Shaping / Top of the foot
Round 1 :  K to last 4 st on the needle , K2tog x 2, K2 Tog x 2, K to end
Round 2 :  P to last 4 st on the needle , P2tog x 2, P2 Tog x 2, P to end
Round 3 :  K to last 4 st on the needle , K2tog x 2, K2 Tog x 2, K to end
Round 4:  P to last 4 st on the needle , P2tog x 2, P2 Tog x 2, P to end
Round 5 :  K to last 4 st on the needle , K2tog x 2, K2 Tog x 2, K to end
Round 6:  P to last 4 st on the needle , P2tog x 2, P2 Tog x 2, P to end

16 st on each needle remaining.

Ankle Eyelets for Icord:
* K 1, YO, K2 tog *, repeat to last stitch on the needle, K1, repeat on the other needle.
Next Round : P

Top Ribbing  
Continue pattern in round for 6 rows:
Round 1 : *K1, P1*, repeat to end.
Round 2 : P all st
BO in purl pattern (if foregoing ruffle).

Icord:
2st icord for 23inch or 24inch crochet chain, then slip stitch , to be treaded through the YO holes

Optional Front Decoration:
sow on the front a small bow

Cast on 15 stitches.
Row 1: knit all stitches
Row 2: knit 2 stitches, purl 11 stitches, knit 2 stitches
Repeat rows 1 and 2 till you have 16 rows. (8 repeats)
Bind off loosely, weave in all ends.
Thread a length of yarn onto a darning needle. With the thumb and index finger of the hand not holding the needle, pinch the middle of the knitting so you get two even ridges. Sew the middle together with a few stitches and then wrap the remaining yarn around the middle of the bow. Sow onto the bootie. Fasten off yarn and weave in ends


 (Update: my handsome cables baby boy cardigan free knitting pattern will go perfect with these booties).

Please feel free to share your finished project by adding your comment to this post. ❤ Happy Knitting! 

Knitted Baby Hat - Frilled Baby Girl Bonnet

Knitted Baby Hat - Frilled Baby Girl Bonnet

After knitting a blue baby hat when expecting my fifth baby (I did not know what I was having), I moved onto a pink baby hat. I chose this frilled baby girl bonnet free Ravelry pattern, for two reasons - firstly a girl can never have too many frills, and from my experience, baby hats that allow tying them under the chin, tend to stay better on a wriggly baby.
It was not the easiest project, there is a lot of knitting, plus there's some few challenging P3tog, that will make you suffer if you don't have right needles or knit too tight.
Also, when joining the first frill to the bonnet (picking up stitches) remember to either forgo the second knit row, or add extra knit row, to end up back on the right side, just like the other comment said.
I decided to only do one frill and not include second one at the back, to simply the bonnet.
I did 6 repeats of the bramble 4-row pattern, instead of 5.
Also I improvised at the back, and did a 3x2 rib instead of garter neck edge, and added 2x12inch icords. (I think the decrease description should not have the K2 at the beginning of each row)
It looks very pretty and it will be perfect for a dolly once baby is finished with it, if it’s a girl :) or it will be perfect for a dolly if it's a boy.
Just remember to keep your purl rows stitches loose, otherwise you’ll be struggling with all those P3Tog on the next row.

Knitted Baby Hat - Frilled Baby Girl Bonnet

Knitted Baby Hat - Frilled Baby Girl Bonnet

Knitted Baby Hat - Frilled Baby Girl Bonnet


Knitted Baby Hat - Frilled Baby Girl Bonnet

Knitted Baby Hat - Frilled Baby Girl Bonnet

Knitted Baby Hat - Frilled Baby Girl Bonnet

Update: The baby turned out to be a boy, and ended up wearing his blue baby hat after all. 

Wednesday, 9 July 2014

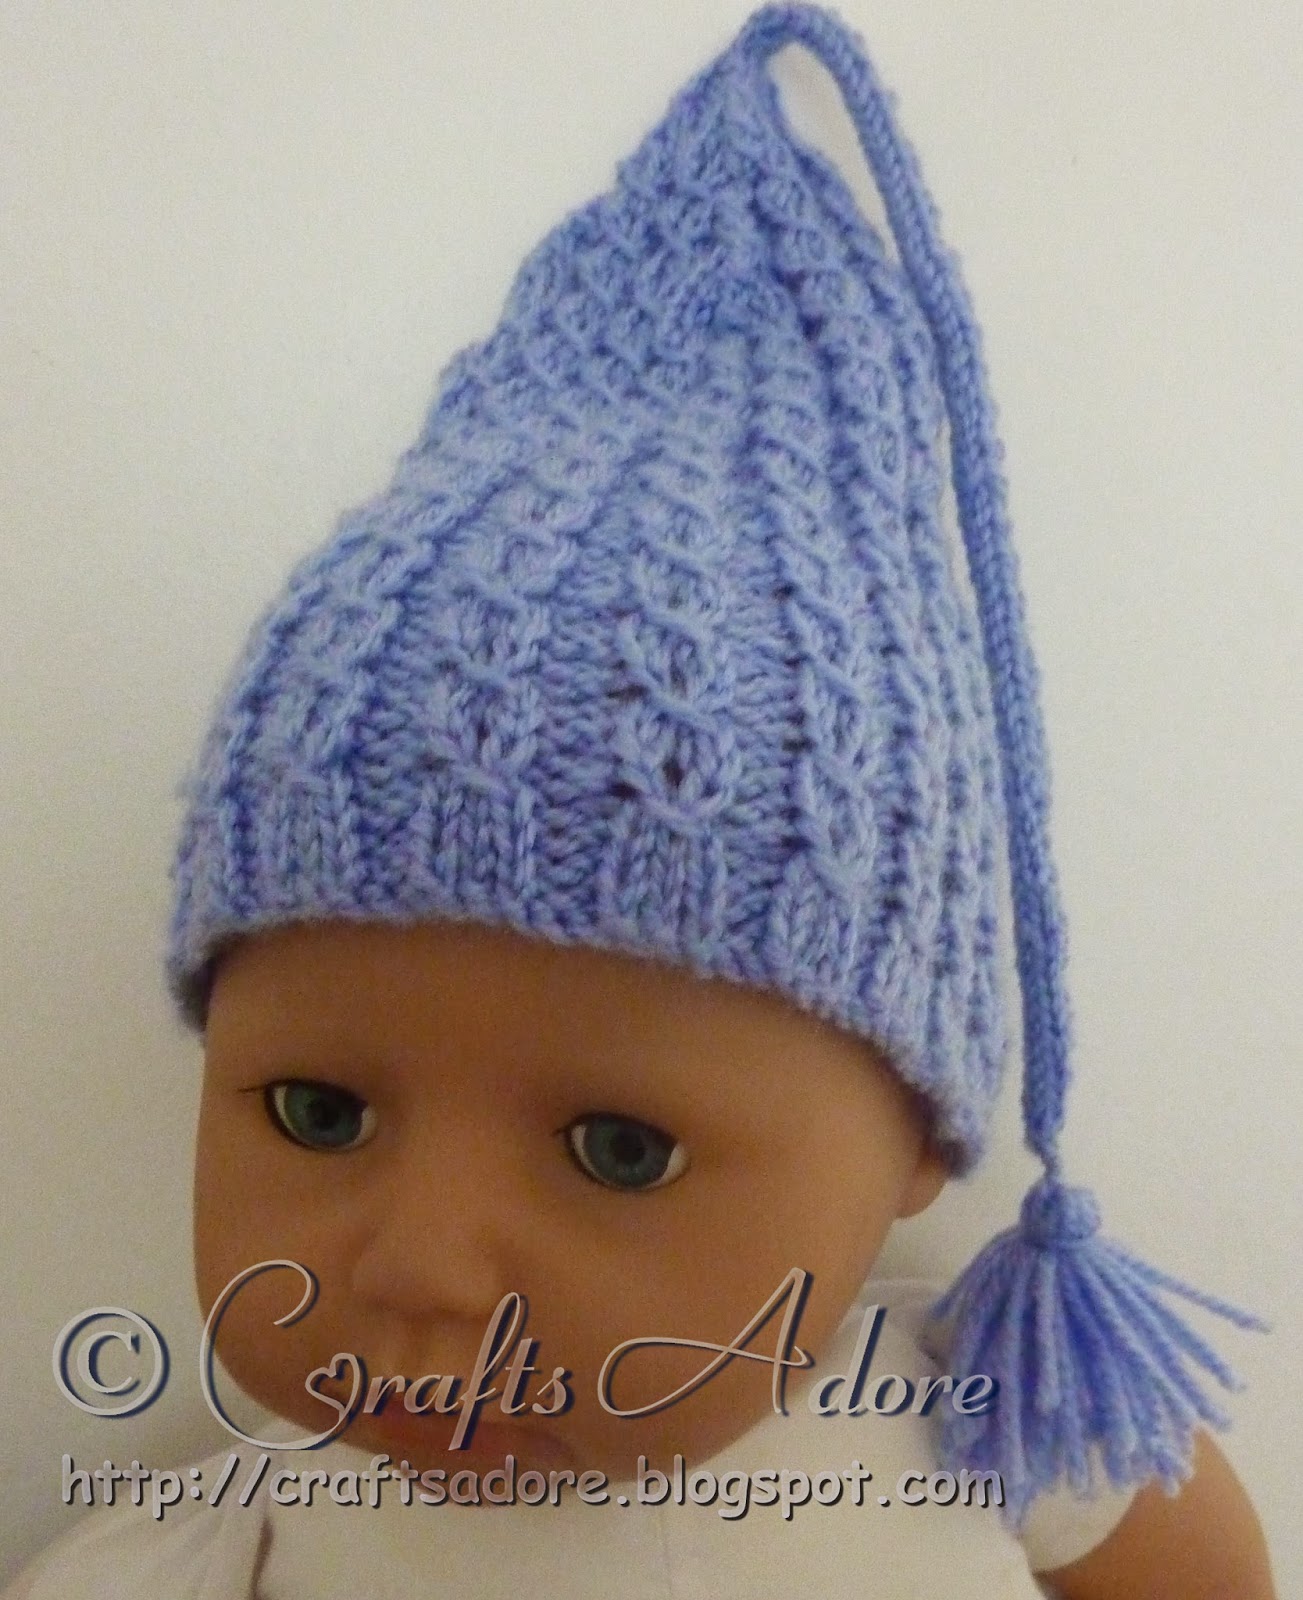
Knitted Baby Hat - Incredible Expanding Gnome Cap

Knitted Baby Hat - Incredible Expanding Gnome Cap

When expecting my fifth baby, I knitted a set of baby cardigan, baby hat and baby booties - this baby hat was knitted using a free pattern from Ravelry


Knitted Baby Hat - Incredible Expanding Gnome Cap
In fact, I did 3 different hats because I did 3 different sets - one unisex, one for a girl and one for a boy (it was a fun practicing knitting), as demonstrated by my lovely dollies models:


Knitted Baby Hat - Incredible Expanding Gnome Cap


Using 3.25mm circular needles and DK yarn, CO 100st, I did 8 rounds of pattern repeat to achieve 4 inches. 

It's a very easy pattern to follow and indeed very stretchy, especially with cable cast on. 

Also, as I was going for an extra pointy baby hat, I repeated the last round and instead of finishing with 12 sts, I P2Tog, K1 the next round (8 sts), then K2Tog the final round to finish with 4 sts before doing icord and small tassel.
Knitted Baby Hat - Incredible Expanding Gnome Cap

Knitted Baby Hat - Incredible Expanding Gnome Cap

Knitted Baby Hat - Incredible Expanding Gnome Cap

Knitted Baby Hat - Incredible Expanding Gnome Cap


Update: My baby turned out to be a boy, and ended up wearing his incredible expanding gnome cap most of the time! And it was a perfect match for my handsome cables baby boy cardigan free knitting pattern.


Knitted Baby Hat - Incredible Expanding Gnome Cap
Isn't he a doll? Perfect hat for a newborn...


Knitted Baby Hat - Incredible Expanding Gnome Cap
...but a bit too small for 10 month old.

Note: For safety reasons I would strongly advise not to make the cord too long so it does not go around baby's neck or into their mouth. 


Tuesday, 8 July 2014

Crochet Amigurumi Bunny Soft Toy

Crochet Amigurumi Bunny Soft Toy

This crochet bunny amigurumi soft toy has been a long time in making - I've made the body and the limbs two months ago, but never got round to finishing the head. I wanted to make it into some other toy, as I've had enough of bunnies for this year already, but the kids love the bunnies (and let's face it - me to, there's just something so cute about those long ears...). In the end, I pulled myself together and finished it just in time to give it to my second daughter as a good luck charm for her going away on a school trip.

He (she?) is much bigger then the bunnies I have crocheted before, because I held the yarn double. I love the changing colour on this cotton yarn, and I think even though it's soft blue and lilac, it's girly enough to be a "she" bunny after all...

Crochet Amigurumi Bunny Soft Toy
I know I will be loved...

Crochet Amigurumi Bunny Soft Toy
..and cuddled...

Crochet Amigurumi Bunny Soft Toy
...a lot!

Little Chirpy Chicks Amigurumi Soft Toy

Little Chirpy Chicks Amigurumi Soft Toy

I fancied making a little toy to represent each of my children, to display every year as an Easter decoration. I found this free Ravelry pattern for little chirpy chicks, which was just perfect.

I chose different colours for the "skirts" (yarn is from Dolly Mix in baby soft pastels range). They easy enough to make, but since I have to make five, I've had quite enough after the last one.. so they never made into the little chirpy chicks after all - they are still waiting to hatch. I quite like them as the little eggs, and in spite of the superstition, I did put them all in one basket :)
Little Chirpy Chicks waiting to Hatch Amigurumi Soft Toy

Little Chirpy Chicks waiting to Hatch Amigurumi Soft Toy

Little Chirpy Chicks waiting to Hatch Amigurumi Soft Toy

Knitted Unisex Baby Hat

Knitted Unisex Baby Hat

Following the "success" of my first ever knitted project - Hearts baby blanket - I was eager to try my hand at knitting a baby hat for my new baby.

Again, I turned to Ravelry as it's such a vast database of free patterns, and many are suitable for absolute beginners. I chose "Simple newborn hat with a touch of lace" project as it seemed simple enough.

Knitted Unisex Baby Hat

Since I did not have the same yarn, it was a bit of a guesswork to decide on number of stitches to cast on. I knew however, that I did not fancy knitting with multiple knitting needles in the round, so I opted to learn "Magic loop" method off YouTube - it took several attempts to grasp it but I was definitively worth it!

CO 90 st on a magic loop 3.25mm circular needles. Started with 6 rows of 1K,1P rim, followed by 9 knit rows. Then Lace pattern as per instructions. Continued knitting till 4inch tall, and then followed reduction pattern. Hat turned out to be about 41cm circumference, but the rim can be double folded to fit a newborn. As a final touch, added an i-cord and a leaf from the pattern by White Apple Baby Hat by Michaela Klose. Used a baby doll as my trusted model.
Knitted Unisex Baby Hat

Knitted Unisex Baby Hat

Knitted Unisex Baby Hat

Knitted Unisex Baby Hat

I’m very happy with it since it’s only my second ever project so quite easy pattern for a beginner to grasp. And I felt quite proud to try putting my own stamp on the project by customising it a little, with the addition of the leaf, even though I feel it turned out a bit too big. But as it was intended to be only used for the new baby after being born, I decided to keep it as it is.

Update: The baby "liked" that hat (and the blanket), and he looked absolutely adorable @ 1 day old in it (although the hat had to be turned up a few times as it was a touch too big).
Knitted Unisex Baby Hat
Looks much better on a real baby than the doll


Monday, 7 July 2014

Crochet Spring Bunny Amigurumi Soft Toy

Crochet Spring Bunny

I used this free Ravelry pattern to crochet a quick bunny for my youngest daughter. I'm a bit of an amigurumi addict now, having done a few bunnies this year.

This was a very quick make, the instructions are very clear so highly recommended for an amigurumi crochet beginner, and the finished bunny looks adorable with the safety eyes in, rather than embroidered. Even though I've used worsted baby soft yarn, it still looks tiny. I suppose that's how tiny amigurumi is, but having seen a few larger toys that I have made for other kids, she was a bit disappointed :( Never mind, I'll knit her a larger toy for her birthday. She's still happy with it though and always asks for it at bedtime to snuggle with (she's only 3).

Crochet Spring Bunny Amigurumi Soft Toy
Tiny but adorable
Crochet Spring Bunny Amigurumi Soft Toy

Crochet Spring Bunny Amigurumi Soft Toy

Knitted Unisex Baby Blanket

Knitted Unisex Baby Blanket

Last year, when expecting my fifth baby, I had a sudden urge to learn to knit. I tried knitting at school, long long time ago, but the result was an over-sized headband and a very long and uneven scarf. I was discouraged by my teacher who thought that because I'm left-handed, I'd be no good at hand crafts. This time, I was determined to teach myself. Armed with a number of YouTube videos, a pair of cheap circular needles and some white value DK yarn from local HobbyCraft, I persevered.

I opted for a "simple" Heart Blanket (probably not the simplest pattern for a newbie, but I do like a challange), available as free pattern from Ravelry.

A week later I emerged victorious - although a bit sleep deprived, with a finished baby blanket to proudly wrap my new baby in (and I feel I proved my old teacher wrong - left handed people CAN knit!!!). I opted for white yarn because a) it's my favourite colour, and b) I did not know the sex of the baby.

Knitted Unisex Baby Blanket
Stitch markers are essential

Knitted Unisex Baby Blanket
Hearts are faintly visible

Knitted Unisex Baby Blanket
Finished baby blanket


CO for 12 hearts = 168 st, overall size of blanket ended up roughly 120cm x 90cm.

This blanket is now very special to me - it has been well used by the new baby, but also because it's actually my first ever handmade project, which started me off on the CraftsAdore path of many more craftiful creations.