Showing posts with label Crochet. Show all posts

Friday, 15 April 2016

My One Week "Spring Cupcakes" Attic24 inspired Cosy Striped Crochet Blanket in Scheepjes Stone washed XL

My One Week "Spring Cupcakes" Attic24 inspired Striped Crochet Blanket in Scheepjes Stone washed XL


For anyone who follows my crafting journey (mainly crochet) on my second Instagram account - @craftsadore you may have seen I've been working on a "Spring Cupcakes" Attic24-inspired cosy stripes crochet blanket for one of my daughters for the past week.

My one week Cosy Cupcakes Stripe Blanket from Lucy Attic24 blog free crochet pattern


Well, today it's I'm super excited to have finished it, and I can't even express how happy I am with it (I honestly couldn't stop smiling all the way through making it :D), for two main reasons:


Firstly, normally the multi coloured blankets are outside my comfort zone, but these Scheepjes Stone wash XL colours are soft and "my kind" of colours - most of my yarn for this blanket came from the Mandala Madness Crochet-Along official pack, but for some reason the colour choice for that project did not agree with me... so I decided to do Mandala Madness in my own colours....and since I had all this beautiful yarn left in my stash, I wasn't sure what to do with it...until I lined all the balls up in a semi-coordinated colour sequence (pink, brown and yellow go very well together)... and my daughter wholeheartedly approved...I was super excited too - they just go so beautifully together...

Secondly, if you EVER tried to crochet a full size single bed blanket (rather than a baby size one) you'll know it takes A LONG time, a lot of hours and sometimes it may take weeks, months or even a year to finish one. Since I've got 5 kids (and myself and my hubby) to make blankets for this year (UK weather is mainly grey and damp so blankets are essential to snuggle under whilst watching Netflix etc. :))...I don't really want to spend a year to finish one - I need a FAST blanket, because the minute I finish one, the next kid  in line is asking - "Mum, are you going to do mine next...."...so no time to waste :) 

Therefore imagine my excitement when this blanket have been finished in under a week!!. Disclaimer - I am a full time mum, and when I start a project, I usually stay up well past midnight to work on it...so a more sane / normal crocheter may take a bit more time than a week ...but still, it's much faster than months or even years.


The reason why it's so fast is because I've used Scheepjes Stone washed XL yarn, which is "Aran" weight and works up much faster than a DK yarn that is normally recommended for this "Attic 24" striped blanket (free pattern on Lucy's blog). Having previously done a "granny stripes" blanket for my other daughter, also from Lucy's Attic24 blog, in Stylecraft Special DK, which took over a month of long hours to complete, I will now stick with Aran weight in the future... although if you're looking for a cost-effective blanket, Acylic is cheaper than cotton (Stonewash is mixture of cotton and acrylic) and you could also hold 2 strands of DK double...

Cosy crochet blanket in cosy colours and cosy yarn


For anyone who's interested in making one of those Lucy Attic24 cosy crochet blankets, I'd like to share the following top 3 tips / improvements to her otherwise super relaxing free crochet pattern:

1. Chainless Foundation Row

Start with a chainless foundation row instead of chaining individual chains. It is much faster and much better at producing a nice foundation row - there's lots of great YouTube videos if you don't know how to do it. For projects where more than 20 chains are required - I ALWAYS substitute it with chainless foundation row instead. It's a life and time saver skill. Also, since that way you're doing 2 rows in 1, you can tell straightaway how wide your project is going to be, instead of waiting to do the second row...

Chainless foundation row - much faster than chaining 200ch!

2. The Right Yarn & The Right Hook

DK yarn will work up slower than Aran, and Chunky is obviously even faster. For Scheepjes Stonewash DK the recommended hook is 5-5.5mm. I have recently learned that I am a tight crocheter, so in order to loosen my tension I have used 6mm hook for this project - the result is a super soft blanket I am super happy with. Check your tension - each colour stripe aka a 2-row DC (treble in UK) crochet stripe is about 1" in my blanket

My first Attic24 granny stripe blanket turned out too short (photo below) and I had to do extra week's work to add extra stripes to make it longer :( Now I know I should have used larger hook and "lifted" my golden loop a bit more...

My Granny Stripe blanked in Lucy Attic24 sunny pack DK Stylecraft yarn took ages


3. Chainless Row Start aka Starting Stitches and Standing Stitches

Since working on some crochet-along projects I've learned to use Standing and Starting Stitches - great technique if you don't want to have "thin" stitches that chaining 3 at the beginning of the row creates - best YouTube Tutorial imho is by moogly blog (she also does left-handed versions of her tutorials, which I appreciate very much) It took me a while to master it, but it's so much faster and neater so I do recommend you give it a go.

And every time you start a new row, start with a Standing Stitch instead of chaining. Great tutorial on here and again, on moogly blog YT channel.


My Cosy Stripe Blanket Ta-dah moment


So finally, for anyone who's interested on big my "Spring Cupcake" Attic-24 inspired blanket is, the colour sequence and the number of balls of Scheepjes Stonewash XL used (roughly, as I wasn't keeping a detailed yardage count), here is my "ta-dah" moment :)

Size

Using chainless foundation row method, I did enough dc stitches to end up with 46 "granny clusters" of "doubles" (UK trebles) AND + 1 so a total of 139 dc stitches (you NEED that extra 1 stitch so the next row works out properly when you start your granny clusters as per Lucy's pattern notes). Using 6mm hook I ended up with a 112cm/44" wide blanket. You need to do as many stitches as you need to reach the required width (total number of stitches must be divisible by 3) but remember to add that extra 1 stitch.

Finished size 63" by 44" including border (160x112cm) unblocked (I don't bother blocking striped blankets) which is big enough for single sized UK bed (as modelled by a spare matters in the kids playroom :)). If you want it longer, you could add extra stripes, but I've run out of yarn :)
Single size bed cosy striped crochet blanket

Colour Sequence

My colour sequence was largely governed by the fact that I needed to use some yarn from the Mandala Madness 2016 Cal pack, and I also had some single balls of other Stonewash XL colours -  the break up the monotony of brown-yellow-pink and which my daughter calls "sprinkles" in our "Spring Cupcakes" blanket colour design :)

Cosy stripes colour sequence

(note: after the first 33 colour stripes, the colours repeat themselves, ending with brown, making a total of 67 colour stripes (each stripe is made up of 2 rows)

1 Brown Agate aka Brown
2 Rose Quartz aka Pink
3 Corundum Ruby aka Ruby
4 Coral
5 Citrine aka Yellow
6 Brown
8 Pink
9 Green Agate
10 Citrine
11 Ruby
12 Pink
13 Brown
14 Citrine
15 Green Agate
16 Amazonite
17 Ruby
18 Pink
19 Brown
20 Citrine
21 Green Agate
22 Amazonite
23 Yellow Jasper
24 Lemon Quartz
25 Pink
26 Ruby
27 Boulder Opal
28 Citrine
29 Pink
30 Garnet
31 New Jade
32 Canada Jade
33 Citrine

Start the sequence again from 1 Brown as no. 34, and finish with Brown as last stripe no. 67.

Yarn Used

Each colour stripe (i.e. 2 rows) takes about half a ball. So you will need:

1 x New Jade
1 x Canada Jade
1 x Boulder Opal
1 x Coral
1 x Yellow Jasper
1 x Lemon Quartz
1 x Carnelian (or Red Jasper)
6 x Brown Agate
6 x Citrine
7 x Rose Quartz (Pink)
4 x Corundum Ruby
3 x Green Agate
3 x Amazonite

total 36 balls, you will have a small amount left

Weaving in the Ends

I leave weaving all the ends in before I start the border. There's not as many to do as there would be if you were making it in DK yarn, and I don't like to stop crocheting in the middle of the project. It takes the same time, weather you do it after each row or at the end of the project, but imho it takes faster to do it at the end as you get "into the rhythm" rather than switching between a hook or a needle. In the end, it took me half a day to wave in the ends...


Whilst I love Scheepjest Stone wash XL yarn, the only criticism I have so far, is the huge number of knots in the actual balls, which I had to cut off, which meant extra tails to weave in randomly in the middle of the stripes of my blanket.

Border aka Cherry on the Cake

For my blanket border, I opted for the "Spot on Edging" aka linen stitch from Lucy's blog, with the modification of starting with a standing sc stich (dc UK terms) instead of chaining - so much easier!


Base Round - in pink - just over 1 ball used
Round 1 - in brown - half a ball used
Round 2 - in carnelian - half a ball used
Round 3 - in brown - half a ball used

Hope that helps if you're considering making one of Lucy's Atttic24 crochet cosy stripes blankets, but much faster, in Aran weight yarn :)

Attic24 cosy stripe blanket in Aran Scheepjes Stonewash XL yarn


Many thanks !
AC @ CraftsAdore (my crafting Instagram @craftsadore2)


Wednesday, 16 March 2016

Frozen Inspired Crochet Dress for American Girl Doll or other 18 inch dolls Free Crochet Pattern

Frozen Inspired Crochet Dress for American Girl Doll or other 18 inch dolls Free Crochet Pattern


I got inspired by our Frozen Custom American Girl Doll, Elsa, to make her a crochet dress. I know cold never bothered her anyway, but a little handmade crochet dress never hurt anyone :)

The dress is an improvised extension of a free pattern for a top for an American Girl doll or other 18" dolls, already available on Ravelry, so you need to refer to that pattern for the top part first - this free crochet pattern is amazing and so versatile and I totally recommend :).
Frozen-inspired crochet dress for our Custom American Girl Doll Elsa

I am happy to share my pattern notes to extend the free pattern for the 'SC top' to make it into this American Girl doll frozen-inspired crochet dress pattern for free, providing that you follow this copyright notice:

Copyright Notice
Feel free to share a link to this pattern by linking to my blog and giving copyright credit to the original pattern owner for the SC Top pattern, and the rest to © CraftsAdore, but do not copy the pattern and claim as your own. The pattern is as-is, and I cannot provide any individual support on it. This pattern may not be used to produce items for commercial purposes - you may crochet from this pattern for own personal use only or for charity. Please feel free to share your finished project by adding your comment to this post or tagging me on Instagram. ❤ Happy Crocheting ! 

Size:
Since my dress is totally improvised to fit my specific American Girl doll (originally Grace Thomas), you may need to adjust the pattern slightly to increase or decrease extra stitches, as not every American Girl doll is the same size (older dolls are more "chubby" and newer dolls are more skinny), and other 18" dolls may be slimmer/different shapes

I use US Crochet terms:
sc = single crochet (double in UK terms)
dc = double crochet (treble in UK terms)
ch = chain
hdc = half double (half treble in UK terms)
dec = decrease 2 stitches together to make 1 st
inc = increase in 1 stitch to make 2 st in one stitch

Yarn used: Paton Baby Aran in blue and Hook H / 5mm. Any other Aran / Worsted 10ply yarn can be used - you can check your tension by trying it on your doll. I used DK weight yarn for the "belt" and trimming which seemed to work well together.


Top – make as per SC top pattern, up to the Row 15 in blue, then change colours to White for the "belt" i.e. Row 16&17 (I used same white for belt and edging)
Frozen-inspired crochet dress for our Custom American Girl Doll Elsa


Row 16 SC in white, then continue in white:
Row 17 *(SC, CH1, DC) in next st, skip 1 st * repeat till last 1 st. 1 sc in last st. (basically the same as row 21 of original SC top pattern).   Switch colour to blue.


Row 18 - continue in blue: Ch4 for button loop, then SC every other st to end up with 45 st again at the end of the row. (note: if you want to use ribbon as "lace" closure for the dress, you need to do loops on either side of the top)

Row 19 - DC all round, but increase in the beginning (2 DC in first stitch) and every 10st or so till the end, to end up with 50st.
Row 20 - SC all st till end
Row 21 -  DC all st till end, join in the round at the end
From now on, you'll be trying the dress on from time to time every few rounds to check how long you want it and how much decreases to do to fit the doll (it fits legs first rather than through the head...)
Continue in pattern of 1 DC row followed by 1 SC row (it builds up in length quite quickly)
After 5 times of (1dc+1sc) rows in total as counted from white belt, check the fit, and dec evenly to 45 st in SC row by sc2tog (I use invisible decrease)
After total 9 (1dc+1sc) rows, dec to about 40st and continue in pattern of 2 rows consisting of 1dc+1sc rows till ankles are reached. Once happy with length, fasten off and do finishing touches as follows:


Finishing touches:

For Sleeve edges  I used 4.5mm / 7 hook and white sparkly DK yarn – SC all round, and then
*SC, CH1, DC, skip 1 st * all round


For Neck  edges – just SC all round in white DK / 4.5mm hook.

For white frilly bottom edge: white yarn and hook as for sleeve & neck edge:
Round1: SC all round,
Round2: HDC all Round,
Round 3: 2HDC in each st all round. 
Round 4-5 Then 2DC  in each st all round for 2 rounds

Weave in all ends.
Sew on the buttons on the back (alternatively you could have done "button loops" on both edges of the top and use a ribbon to tie it as "laces")

Due to the tight nature of this dress design, your doll won't be able to sit in it, but she'll look super cute standing :)
Frozen-inspired free crochet dress for our Custom American Girl Doll Elsa

If you make this free crochet dress for your American Girl doll or other 18" doll, don't forget to tag me on Instagram : @craftsadore so I can see your makes :)


Monday, 18 January 2016

My New Year Resolution - Crocheting cute animals out of Edwards' Menagerie Patterns by Kerry Lord

My New Year Resolution - Crocheting cute animals out of Edwards' Menagerie Patterns by Kerry Lord

My New Year Resolution for 2016 is to increase my crafting productivity, as well as continue with my passion for American Girl dolls!

I decided to start the year by concentrating on just one project, and one type of craft, rather than spreading myself thin and doing lots of different ones. And when I say just one project, I mean all crochet animals from Edward's Menagerie book by Kerry Lord / TOFT UK. And when I mean all, I mean as much as I can - some are harder and some are easier (I've done the bunnies and elephants before) - but I am definitely planning to attempt all of them, in the bid to improve my amigurumi skills.

My first make, Bridget the Elephant is now completed:


You can join me on my second YouTube channel, CraftsAdore Crafts, as I vlog about my crafting journey this year, and show you the progress. I am also on Ravelry and on Instagram @craftsadore2

And so that our main YouTube channel is more clear as to what it's all about, it has been renamed to CraftsAdore's American Girl Dolls Channel :) where my kids and I plan lots of AG dolls videos so please make sure to subscribe! I predict a very busy & fun 2016 year!


Monday, 2 February 2015

I'm downsizing my crafting... to 18" dolls

I'm downsizing my crafting... to 18" dolls

As the first month of the New Year came to a close, I have been busy planning what to do this year. I have looked back at my last year of crafting, and with a great sadness as I have to admit that I have not done as much as I wanted to (many projects still sit unfinished, craft room overflowing with craft supplies not even used yet, I bet it it all sounds familiar...) so decided that I needed to seriously downsize.

I love all manner of handmade crafts, but there simply isn't enough hours in a day to do everything I want to do ! And with 5 kids in tow, one of them being a very boisterous toddler boy, I don't have as much time to sit down and make stuff as I used to. So with a heavy heart, I decided to downsize my crafting... to dolls.

Last Christmas we discovered the joy of playing with 18" dolls, mainly due to Santa bringing one of my daughters a "Hair Play" doll from Smyths Toys UK by Our Generation / Battat . Now all my girls all wanted a doll, including me!

As much as I love Our Generation Dolls, they mostly look the same, with the same face mold but different eyes and hair colour, and I think they are mainly suitable for children rather than an adult collector. So as I researched what other 18" dolls are available, I discovered American Girl dolls. I fell in love with them there and then. There is SO much variety in American Girl dolls and I adore them all (well, quite a few).

So it's time to come clean: I am now officially an AG doll collector and proud of it :). The possibilities and crafting opportunities for my dolls are endless, so needless to say, I'll be even more busy. My girls all want to join in the crafting so that's great news for family crafting.  At the moment we are starting slowly, with some doll opening videos on our YouTube channel and some dress up fun. But I couldn't resist making a quick "Frozen-inspired" Swarovski necklace for my beautiful Caroline:


And of course, I couldn't resist a few knitting and crocheting projects, most of them inspired by Ravelry free knitting patterns for dolls, as modeled by my lovely Rebecca:

This year, I'm planning to concentrate more on smaller projects for my dolls, and few bits and pieces of home decor in Tilda fabric for the house. And more photography, featuring the dolls of course!
If I can achieve that, then my crafting year will be a success. Fingers crossed!

Tuesday, 8 July 2014

Crochet Amigurumi Bunny Soft Toy

Crochet Amigurumi Bunny Soft Toy

This crochet bunny amigurumi soft toy has been a long time in making - I've made the body and the limbs two months ago, but never got round to finishing the head. I wanted to make it into some other toy, as I've had enough of bunnies for this year already, but the kids love the bunnies (and let's face it - me to, there's just something so cute about those long ears...). In the end, I pulled myself together and finished it just in time to give it to my second daughter as a good luck charm for her going away on a school trip.

He (she?) is much bigger then the bunnies I have crocheted before, because I held the yarn double. I love the changing colour on this cotton yarn, and I think even though it's soft blue and lilac, it's girly enough to be a "she" bunny after all...

Crochet Amigurumi Bunny Soft Toy
I know I will be loved...

Crochet Amigurumi Bunny Soft Toy
..and cuddled...

Crochet Amigurumi Bunny Soft Toy
...a lot!

Little Chirpy Chicks Amigurumi Soft Toy

Little Chirpy Chicks Amigurumi Soft Toy

I fancied making a little toy to represent each of my children, to display every year as an Easter decoration. I found this free Ravelry pattern for little chirpy chicks, which was just perfect.

I chose different colours for the "skirts" (yarn is from Dolly Mix in baby soft pastels range). They easy enough to make, but since I have to make five, I've had quite enough after the last one.. so they never made into the little chirpy chicks after all - they are still waiting to hatch. I quite like them as the little eggs, and in spite of the superstition, I did put them all in one basket :)
Little Chirpy Chicks waiting to Hatch Amigurumi Soft Toy

Little Chirpy Chicks waiting to Hatch Amigurumi Soft Toy

Little Chirpy Chicks waiting to Hatch Amigurumi Soft Toy

Monday, 7 July 2014

Crochet Spring Bunny Amigurumi Soft Toy

Crochet Spring Bunny

I used this free Ravelry pattern to crochet a quick bunny for my youngest daughter. I'm a bit of an amigurumi addict now, having done a few bunnies this year.

This was a very quick make, the instructions are very clear so highly recommended for an amigurumi crochet beginner, and the finished bunny looks adorable with the safety eyes in, rather than embroidered. Even though I've used worsted baby soft yarn, it still looks tiny. I suppose that's how tiny amigurumi is, but having seen a few larger toys that I have made for other kids, she was a bit disappointed :( Never mind, I'll knit her a larger toy for her birthday. She's still happy with it though and always asks for it at bedtime to snuggle with (she's only 3).

Crochet Spring Bunny Amigurumi Soft Toy
Tiny but adorable
Crochet Spring Bunny Amigurumi Soft Toy

Crochet Spring Bunny Amigurumi Soft Toy

Friday, 23 May 2014

A Crochet Bunny Soft Toy is Not Just for Easter

A Crochet Bunny Soft Toy is Not Just for Easter

I admit I have developed a bit of a bunny addiction - it is my favourite soft toy to make. But after spending a week knitting Sirdar Bunny soft toy, I was ready for something quicker.

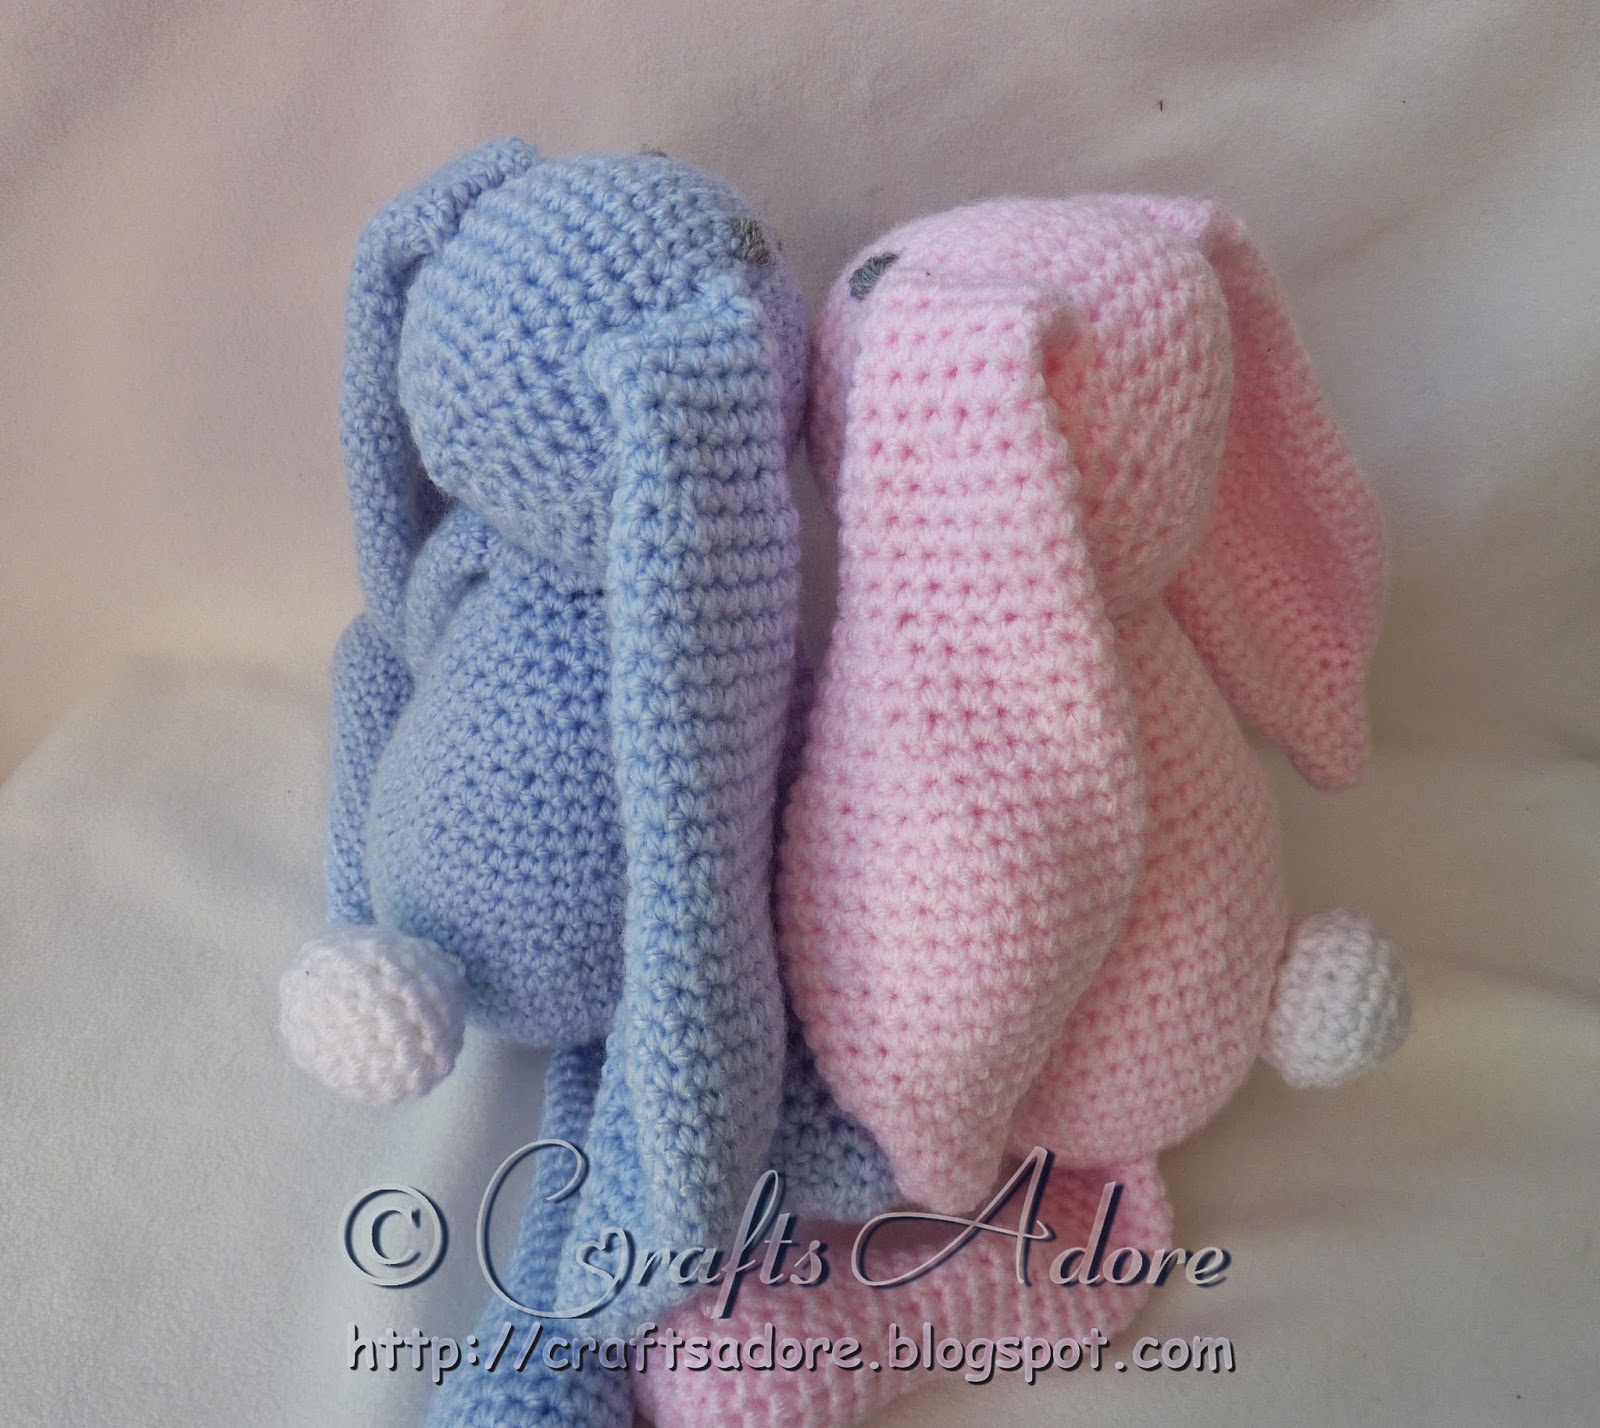
These two adorable bunnies were crocheted by me for new babies in my family to help them celebrate their first Easter. I think you can guess one is a boy and one is a girl :).
Crochet Amigurumi Bunny Soft Toy
We are so cute and cuddly
Crochet Amigurumi Bunny Soft Toy
Ahh, give me a cuddle

Crochet Amigurumi Bunny Soft Toy
Check out our cute tails!

These bunnies are from no particular single pattern - I've made it up by following web tutorials on amigurumi shaping (I strongly recommend Planet June video tutorials on YouTube as she's the best!!!), and some Crochet Bunnies, which can be found on Ravelry. These were made in baby soft Aran value yarn.

I loved making them so much, I was having trouble parting with them. And who's to say that a bunny is just for Easter? In fact, I'm making another one right now for us to keep.

Monday, 19 May 2014

Adorable Lil' Baby Unicorn Crochet Amigurumi

Adorable Lil' Baby Unicorn Crochet Amigurumi

This is my attempt at making Lil' Baby Unicorn by Rachel Hoe. This free pattern can be found on Ravelry and it's easy enough follow, even by a complete beginner. 
Adorable Lil' Baby Unicorn Crochet Amigurumi
Isn't he adorable?
Adorable Lil' Baby Unicorn Crochet Amigurumi
Tail and mane view


Adorable Lil' Baby Unicorn Crochet Amigurumi
I just want to be loved
The yarn used was from a "my first knitting kit" that I bought in a toy store for my daughter to learn to knit. She got bored after about 100 rows of knitting a bag, so I frogged it and turned it into this cute and adorable unicorn - she enjoys it so much better than the would-be bag!